Showing posts with label tutorial. Show all posts

Sunday, May 8, 2011

I've Fallen Weeks Behind

I've been so lazy with my blogging these last few weeks. I had a marvelous school holiday and even escaped to the beach for a couple of days. It was crispy autumn weather. We went to Point Nepean. On the left is the peaceful bay and on the right is the open ocean. We walked through the park and caught the shuttle. It used to be an old army base. There were some very cool rusty relics.
We sat on the beach and walked and drank coffee and ate yummy food.
The boys are studying for their mid years. Hard Life!
I took my hexies with me. They are so portable.

There is no plan with these guys. I am just adding on scraps as I go. No paper piecing. I'm just drawing the lines and sewing them together with running stitch. My textile teacher way back at uni would be horrified but it works! 
I loathe to throw away even the tiniest bits of fabric which is why I am getting so much pleasure out of this project. I also have been using my scraps to make these.

I got the idea from One Shabby Chick. I have linked her straight to her tutorial on how to make these little purses. They are so easy to make and use up lots of scraps.
I think they will make great end of year presents for some of the teachers I work with.
During the holidays I had to baby sit Phil, my class pet. When I first introduced him he looked like this.
During the December holidays he lost his exoskeleton and now looks like this.
He is no longer brown and 'twig like' but green with yellow horny legs and hard to find amongst the eucalyptus leaves. He is also nearing the end of his days. I found out that he is a Goliath Stick Insect which makes sense because he is probably 10" long.
I finished Rivka's quilt for her brother. It really is fun. It's binding was from Denyse Schmidt's new range. Although I can't say I love the range, the colour was perfect for the binding.
I think there is still more to tell but that is for another day.

Friday, September 3, 2010

In Your Dreams

I was meant to go to school on Thursday to work with my year level partner but he cancelled and I was left with a day unplanned. Out came the Kaffe Fassett fabric because I had an idea which involved cool blues and green, shot cotton and stripes. I was going to make a very basic pattern which hopefully would capture the movement through colour and stripes.
Shot cotton is beautiful but is loosely woven and at times has a mind of it's own. I wanted my stripes to all point in the same direction. Cutting triangles, sewing 2 colours together and getting a perfect square is a nightmare. It was time consuming, fiddly and annoying. I know how to lay 2 squares together, draw a diagonal line down one, sew on either side of the line and cut them in half but that doesn't help with stripes as they all end up pointing the wrong way
Anyway, I plodded along and was very happy with the beginnings as I lay the pieces out on the carpet. This may not end up the colour layout but I wanted to see if the idea was going to work.

I packed it up for the night and so far so good.
That night I went to sleep with no thought of the quilt on my mind.
In my sleep though, the shot cottons, stripes and pain of having to cut more triangles must have weighed heavily on my mind.

This is what I dreamt.
Take 2 squares, measured to the correct proportions. I wanted to end up with 3" squares so I cut 4.75" squares which would give me 4 lots of 3" squares with 2 x stripes going horizontally and 2 x stripes going vertically.


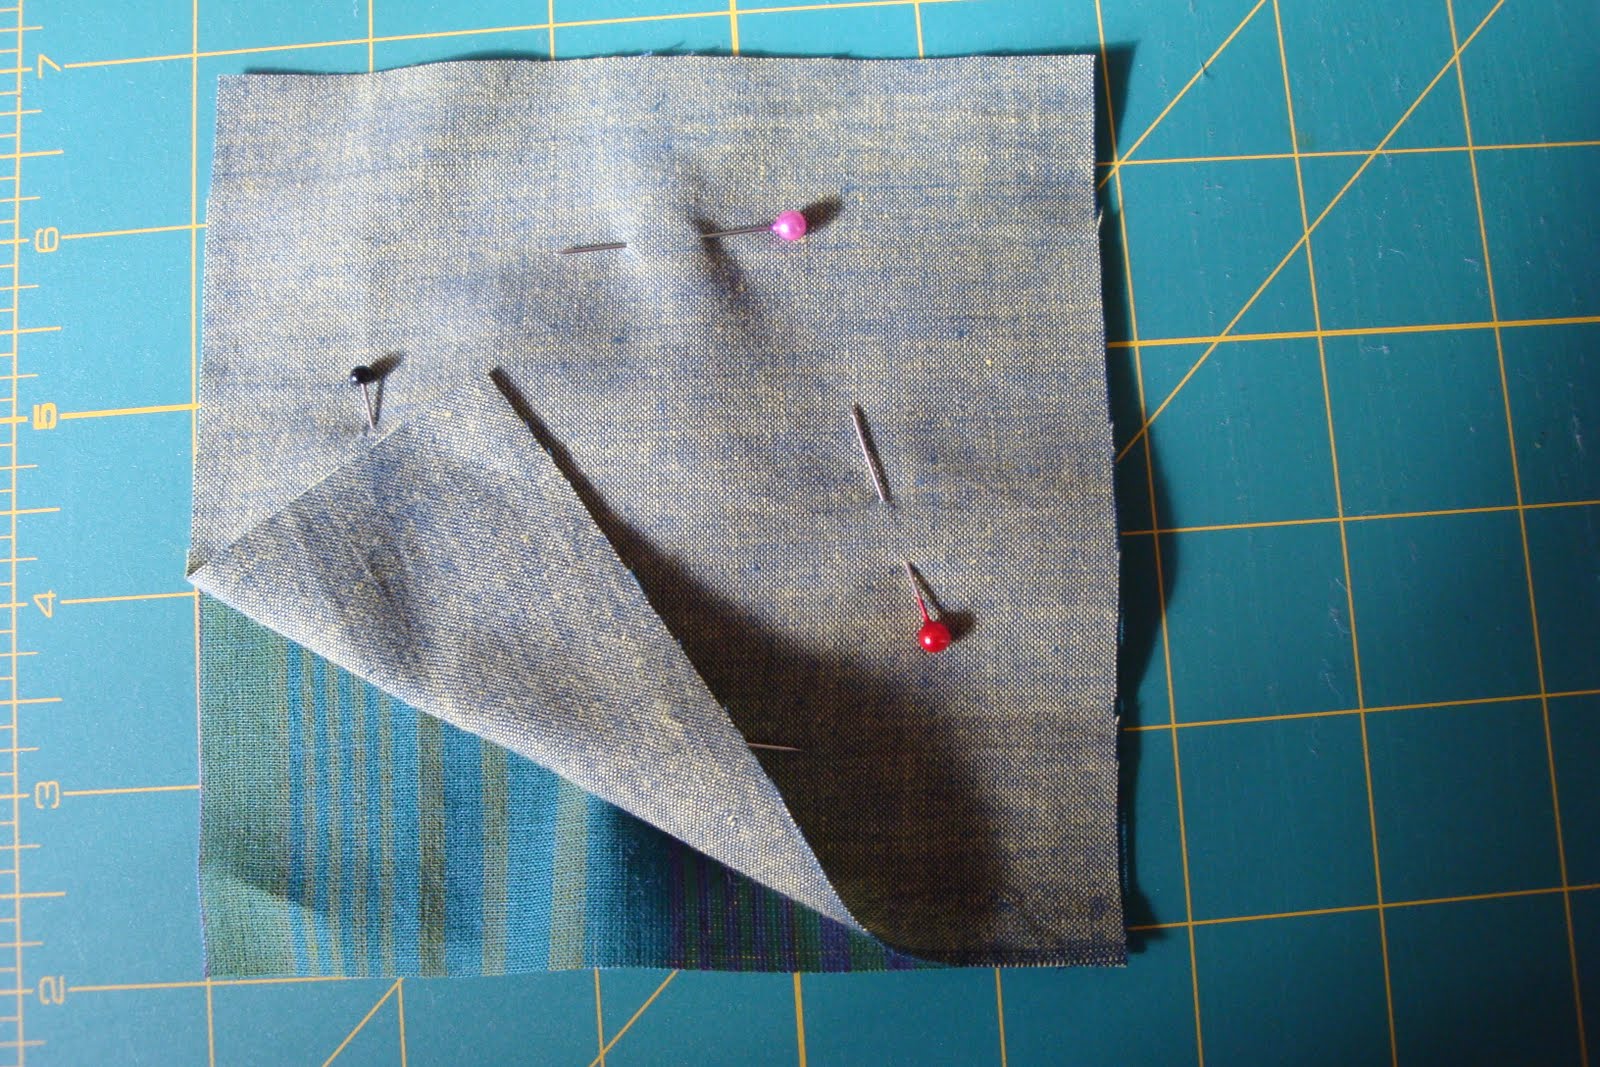
Place one square on to the other and pin it in the middle.


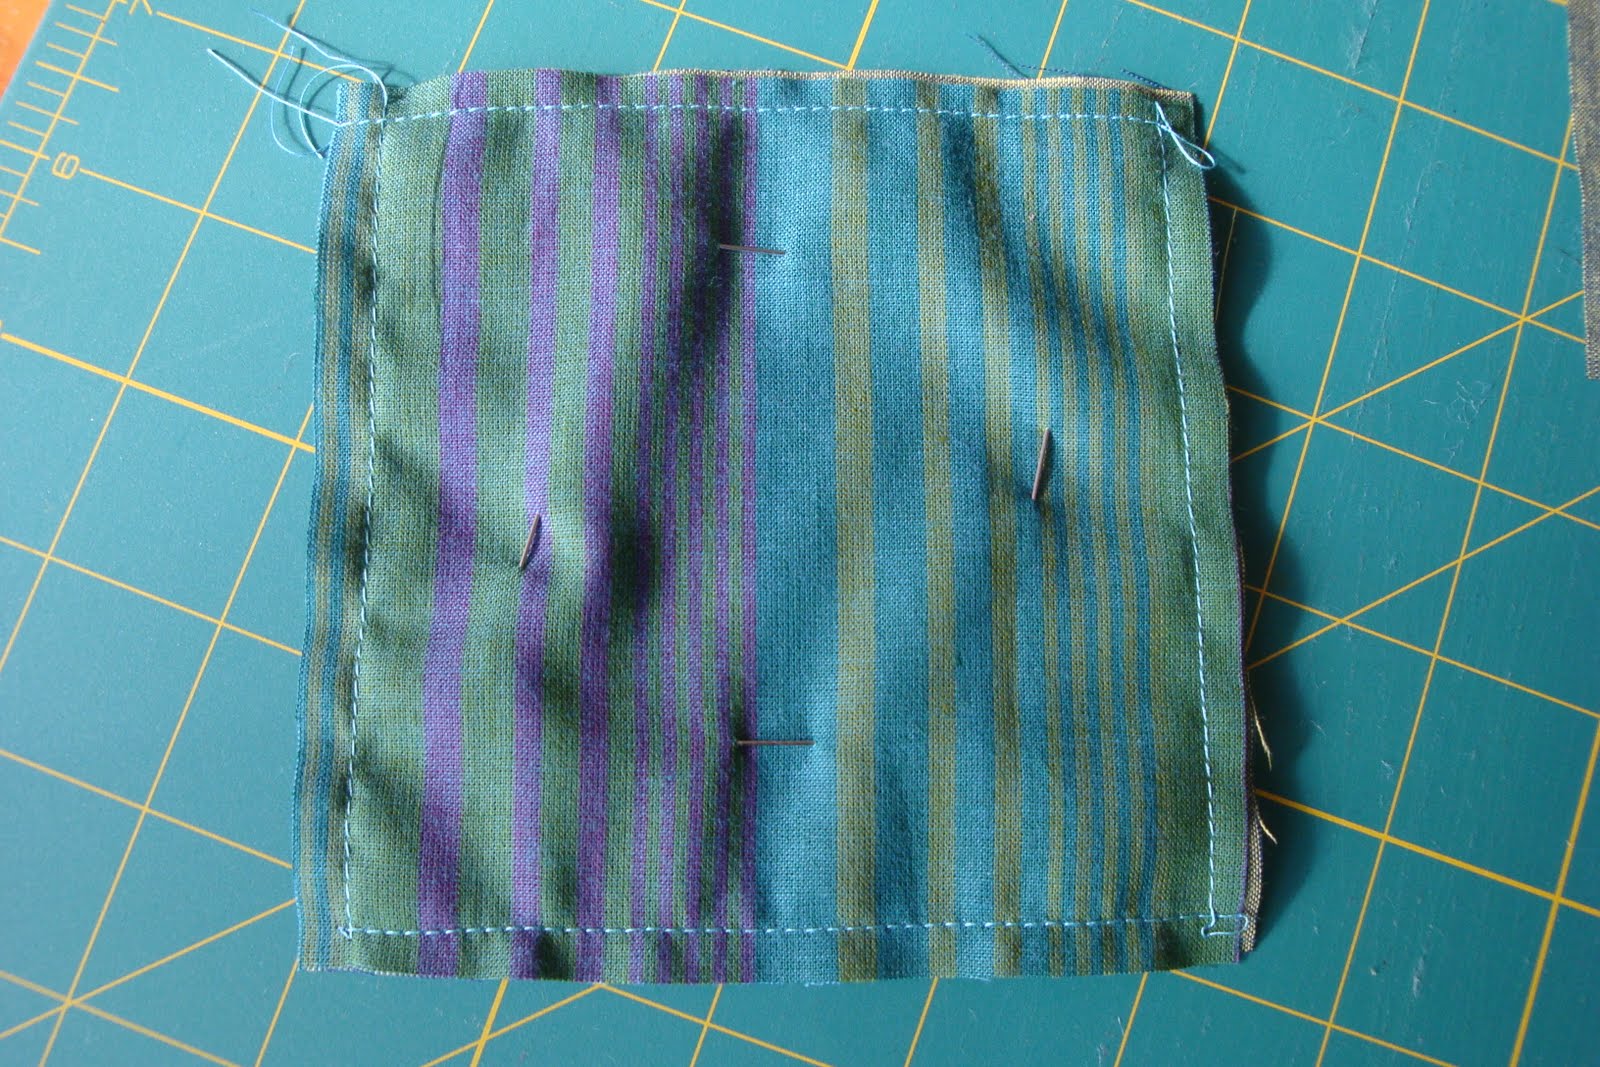
Now sew with the usual 1/4 " around all 4 sides


Iron it flat.


Carefully cut the fabrics through corner to corner diagonally both ways, trying to keep it still so its straight.


Open the triangles and iron them flat and you will have 4 squares as neat as can be!

 
As you can see, 2 have stripes going one way and 2 have stripes going the other.
These took me about a minute to put together whilst the ones I made the day before took much longer, wriggled and became askew.
Now most likely someone thought of this before, or maybe I read it in a book at one time or another but I really don't care. I am just so excited at how easy these were to make.

Saturday, March 27, 2010

How to make a Softie

After machine quilting all day I needed a change so I started to make a new softie without much of a plan.
I drew the outline on Glad Bake. It's not that clear on my tablecloth. The main thing is that whatever you draw, you need to remember that the limbs can't be too skinny because you lose a quarter inch in seam allowance all the way around.


I drew a body, a claw type arm and an ear.
You need to cut 2 bodies, 4 arms and 4 ears.

The material has to be laid back to back. I chose to do the inside of the ears a different colour to the outside.


Once the shapes are cut out it's is a good idea to iron them. I also cut out a piece of felt for the face.


Sew the face on with 2 strands of stranded cotton. You can use running stitch for the outside and for the main features I usually use running stitch or split stitch. I added felt cheeks and lips and goggly eyes which I bought from Spotlight.


Sew up the arms - with fabric right side facing. Snip the corners as it helps when you turn the pieces around to the right side. I always check the front and back of my sewing as sometimes I miss an edge and it is not sewn in properly. Turn the arms around the right way and stuff them. If you are stuffing ears or feet, do the same for all of them.


This is the bit I messed up and had to fix. Take the main body of your softie.
Place the back body on the table with the right side facing up.
Place the arms and ears on the body facing inwards so that the edges stick out of the seams. You can see my ears sticking out of the top of the head.  The arms' ends are sticking out of the shoulders.
Place the front part of the body on top with the good side facing inwards.
I flipped the edge over to show you the arms inside.
Pin everything into position.
If you are sure everything is in the right place make the stitch length on the sewing machine really small as it makes the seams stronger.
If you forget to put in your ears, like I did the first time around, it's a killer to unpick.
I usually start sewing about 3cm under the armpit, going over the first arm, around the head, catching the ears, over the next arm, around the legs and up to the ankle of the second leg.
Stop, leaving about 6-8cm open to turn the toy around. Double back on the sewing machine because it strengthens the edge.  When you turn the toy around it really pulls hard on the seams.

Here it is turned around the right way. It looks like a lamb! Oh well - not what I had expected. One leg is skinnier than the other but that is the fun of all this. You never can really plan something totally. On the right side of the photo the seam is open on the leg.


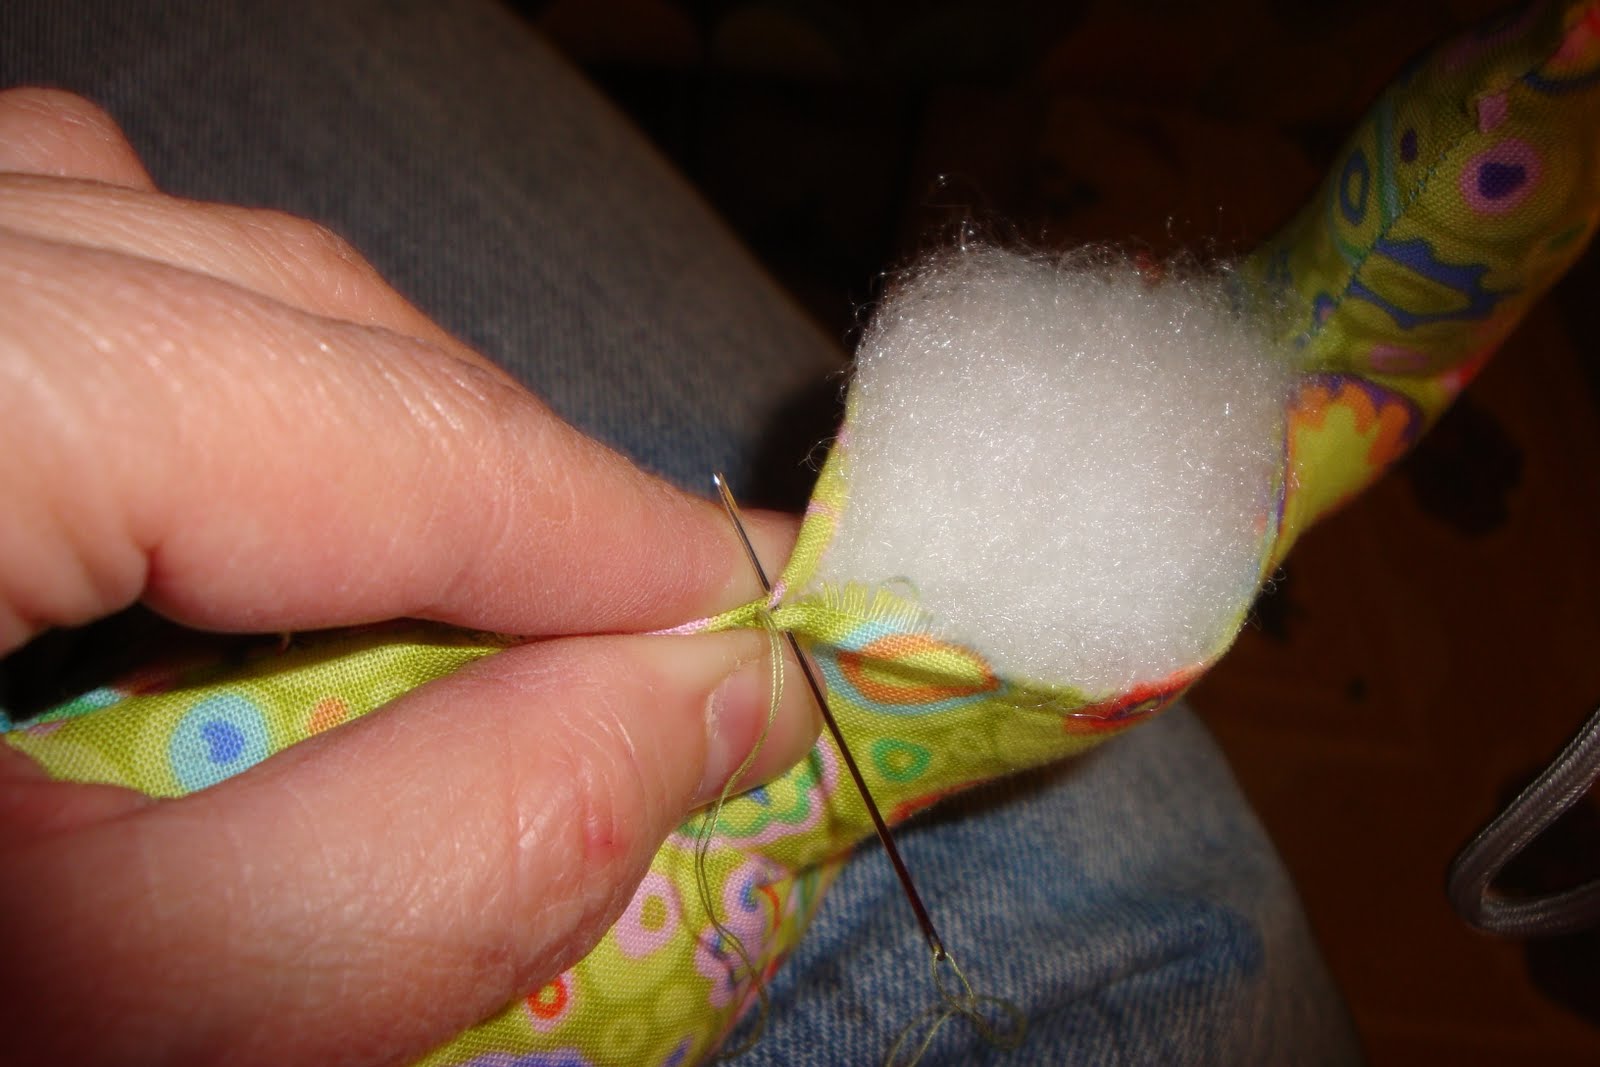
Pinch the seam together and try to roll the edges in as you slip stitch it closed. I had to continue stuffing the legs as I made the hole smaller. I use a plastic chopstick to do it. I tried a bamboo skewer once but it kept poking holes in the fabric. The chopstick has a round edge, is really strong and not too thin so it actually can push the polyfil in.


I sewed the ears down so the pink is showing.

Not my best work but it kept me amused while the boys watched the footy this Saturday night.